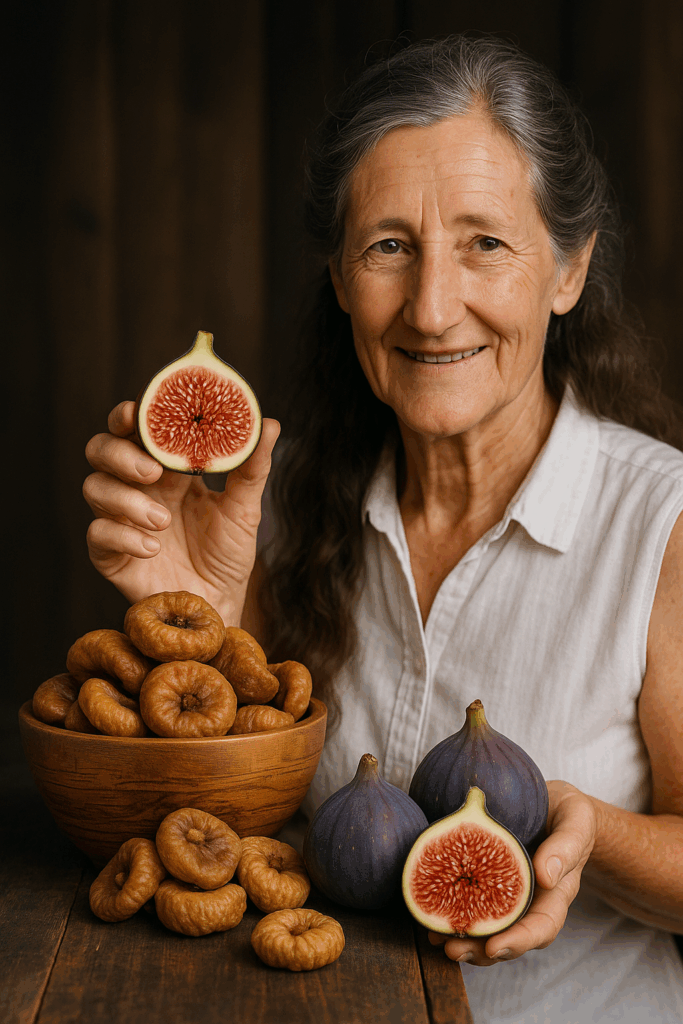
Imagine savoring the sweet, chewy goodness of figs all year round, without a trace of preservatives or chemicals. Drying figs at home is a simple, rewarding way to preserve their rich flavor and nutritional bounty, transforming fresh fruit into a versatile snack or ingredient that lasts for months. Packed with fiber, vitamins, and minerals, dried figs are perfect for trail mixes, desserts, or a quick energy boost. Whether you’re basking in sunlight or using modern tools, this guide makes drying figs foolproof and fun. Ready to turn your fresh figs into a pantry staple? Let’s explore the best methods, tips, and storage hacks to create your own wholesome dried figs.

Why Dry Figs at Home?
Drying figs is one of the oldest preservation techniques, concentrating their natural sugars and nutrients while eliminating moisture to prevent spoilage. This process locks in essential nutrients like potassium, magnesium, and antioxidants, making dried figs a nutrient-dense treat. Home-drying ensures you control the process, avoiding additives found in store-bought versions. Plus, it’s a sustainable way to make the most of a bountiful harvest or market haul, reducing waste and saving money.
The Best Methods for Drying Figs at Home
Choose from three reliable methods—sun drying, oven drying, or using a dehydrator—based on your resources and preferences. Each delivers delicious results with minimal effort.
1. Sun Drying: The Traditional, Eco-Friendly Way
Harness the power of the sun for a natural, energy-free drying method that enhances figs’ sweetness.
Steps:
- Select Ripe Figs: Choose fully ripe figs that are plump, slightly soft, and free of blemishes. Avoid overripe or mushy fruit.
- Wash and Prep: Gently rinse figs under cool water, pat dry with a clean towel, and remove stems if desired.
- Cut or Keep Whole: Slice figs in half lengthwise to speed drying (ideal for larger figs) or leave whole for a chewier texture.
- Set Up Trays: Arrange figs on a clean wire rack or tray, ensuring they don’t touch to promote airflow. Place cut side up for halved figs.
- Sun Exposure: Position the tray in a sunny, well-ventilated spot with at least 6-8 hours of direct sunlight daily. Cover with a fine mesh or cheesecloth to protect from insects and debris.
- Turn Daily: Flip figs every 24 hours for even drying. Bring trays indoors at night to avoid dew or humidity.
- Check Doneness: After 3-5 days (depending on weather and fig size), figs should feel leathery, pliable, and show no juicy spots when squeezed.
Tips:
- Sun drying works best in hot, dry climates (80°F/27°C or higher with low humidity).
- If weather is inconsistent, finish drying in the oven to prevent mold.
- Inspect daily for pests or mold, discarding any affected figs.
2. Oven Drying: Quick and Accessible
No sun? No problem! Oven drying is a fast, controlled method perfect for any kitchen.
Steps:
- Preheat Oven: Set to the lowest temperature, ideally 120–140°F (50–60°C). Use a thermometer if your oven lacks precise settings.
- Prepare Figs: Wash, dry, and halve figs for quicker drying. Whole figs work but take longer.
- Arrange on Baking Sheet: Line a baking sheet with parchment paper and place figs cut side up, ensuring they don’t overlap.
- Dry with Ventilation: Place the tray in the oven, leaving the door slightly ajar (1-2 inches) to allow moisture to escape. Use a wooden spoon to prop it open if needed.
- Rotate and Check: Rotate the tray every 2-3 hours for even drying. Check figs after 8 hours; drying typically takes 8-12 hours, depending on size and moisture content.
- Cool Completely: Remove figs when they’re leathery and pliable, then let them cool fully before storing to prevent condensation.
Tips:
- Use a convection oven or fan setting for better air circulation, reducing drying time.
- Avoid overheating, as high temperatures can cook rather than dry the figs, altering flavor.
- Test a fig by cutting it open; the interior should be dry with no sticky moisture.
3. Dehydrator Method: Effortless and Consistent
A food dehydrator is the gold standard for even, hands-off drying, ideal for large batches or frequent preservers.
Steps:
- Prep Figs: Wash, dry, and cut figs in half or leave whole, based on your texture preference.
- Arrange on Trays: Place figs on dehydrator trays, cut side up, with space between each piece for air circulation.
- Set Temperature: Adjust to 130–140°F (55–60°C) for optimal drying without compromising nutrients.
- Dry and Monitor: Let figs dry for 8-12 hours, checking every few hours. Rotate trays if your dehydrator lacks automatic circulation.
- Cool and Store: Figs are done when leathery and pliable. Cool completely before transferring to storage containers.
Tips:
- Dehydrators vary, so consult your model’s manual for fig-specific settings.
- For larger figs, check the centers for moisture and extend drying if needed.
- Store a small test batch for a few days to ensure no moisture remains before committing to long-term storage.
Storage Tips for Long-Lasting Figs
Proper storage keeps your dried figs fresh and flavorful for months:
🫙 Use Airtight Containers: Store in glass jars, vacuum-sealed bags, or ziplock bags with air removed. Add a food-safe desiccant packet for extra moisture control.
🌡️ Cool, Dark Storage: Keep containers in a cool (below 70°F/21°C), dark place like a pantry. Properly stored, dried figs last 6-12 months at room temperature.
❄️ Freeze for Extended Shelf Life: For storage beyond a year, freeze figs in airtight bags or containers. They’ll stay fresh for up to 18 months and can be eaten straight from the freezer.
🔍 Check Regularly: Inspect stored figs monthly for mold or moisture. If any appear, discard affected pieces and re-dry the rest if needed.

Why Dried Figs Are a Game-Changer
Dried figs are a nutritional powerhouse, offering a concentrated dose of fiber, antioxidants, and minerals in a portable, shelf-stable form. They’re a natural energy booster, perfect for snacking, baking (think fig bars or scones), or adding to savory dishes like tagines. Home-drying lets you customize texture—chewy whole figs or softer halved ones—while ensuring a pure, additive-free product. The process is also a mindful, rewarding way to connect with your food, turning a seasonal treat into a year-round delight.
Safety Precautions
To ensure your dried figs are safe and delicious:
🧼 Start Clean: Wash figs thoroughly and use sanitized equipment (trays, jars) to prevent contamination.
🚫 Avoid Spoiled Figs: Discard figs with mold, unusual odors, or pest damage before drying. Check during and after drying for signs of spoilage.
🌿 Test for Dryness: Squeeze figs to confirm no moisture remains. Store a small batch in a sealed container for 3-5 days; if condensation appears, dry further.
🩺 Allergy Note: If you’re sensitive to figs or sulfites (sometimes present in commercial figs), test a small amount first. Home-dried figs are sulfite-free, reducing this risk.
Get Started with Your Fig-Drying Adventure
Drying figs at home is a simple, cost-effective way to enjoy this sweet, nutrient-rich fruit anytime. Whether you’re sun-drying for a traditional touch, using your oven for convenience, or letting a dehydrator do the work, each method delivers mouthwatering results. Start with a small batch to perfect your technique, then scale up to preserve a season’s worth of figs. Your pantry will thank you, and your taste buds will celebrate every chewy, flavorful bite.
Share this fig-drying magic with friends and family, and let these sweet gems inspire a new chapter in your kitchen. From sun-soaked trays to cozy oven batches, dried figs are your ticket to wholesome, homemade goodness—start drying today!


