✨ Growing your own apple tree indoors may sound like a fairy tale, but with the right approach, patience, and a little love, you can turn a tiny apple seed into a thriving fruit-bearing tree right inside your home. No orchard? No problem. Even a sunny corner of your living room can transform into a mini apple haven.
Let’s dive into the full, easy-to-follow method to grow an apple tree from seed to fruit indoors.
🌱 Why Grow an Apple Tree Indoors
Beyond the excitement of growing your own apples, an indoor apple tree offers fragrant blossoms, lush greenery, and the ultimate satisfaction of harvesting homegrown fruit — all while adding beauty and life to your home.
🌟 With a little planning and care, you can enjoy this rewarding journey from seed to sweet success.
🛒 What You Will Need
- Fresh apple seeds (from organic apples if possible)
- Paper towels and ziplock bag
- Seed-starting soil mix
- Small pots for seedlings
- Large container (at least 10–15 gallons)
- Compost or organic fertilizer
- Spray bottle for misting
- A sunny windowsill or grow lights
- Patience and regular care
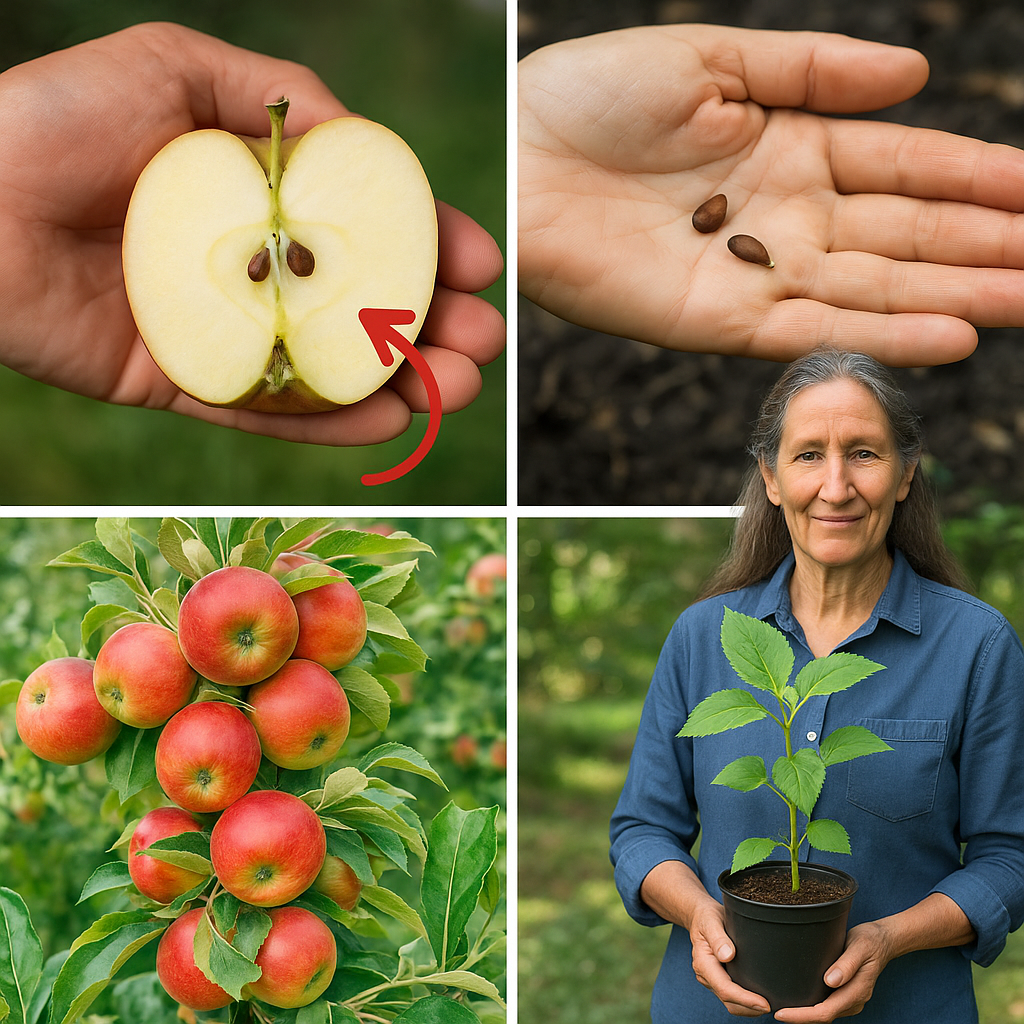
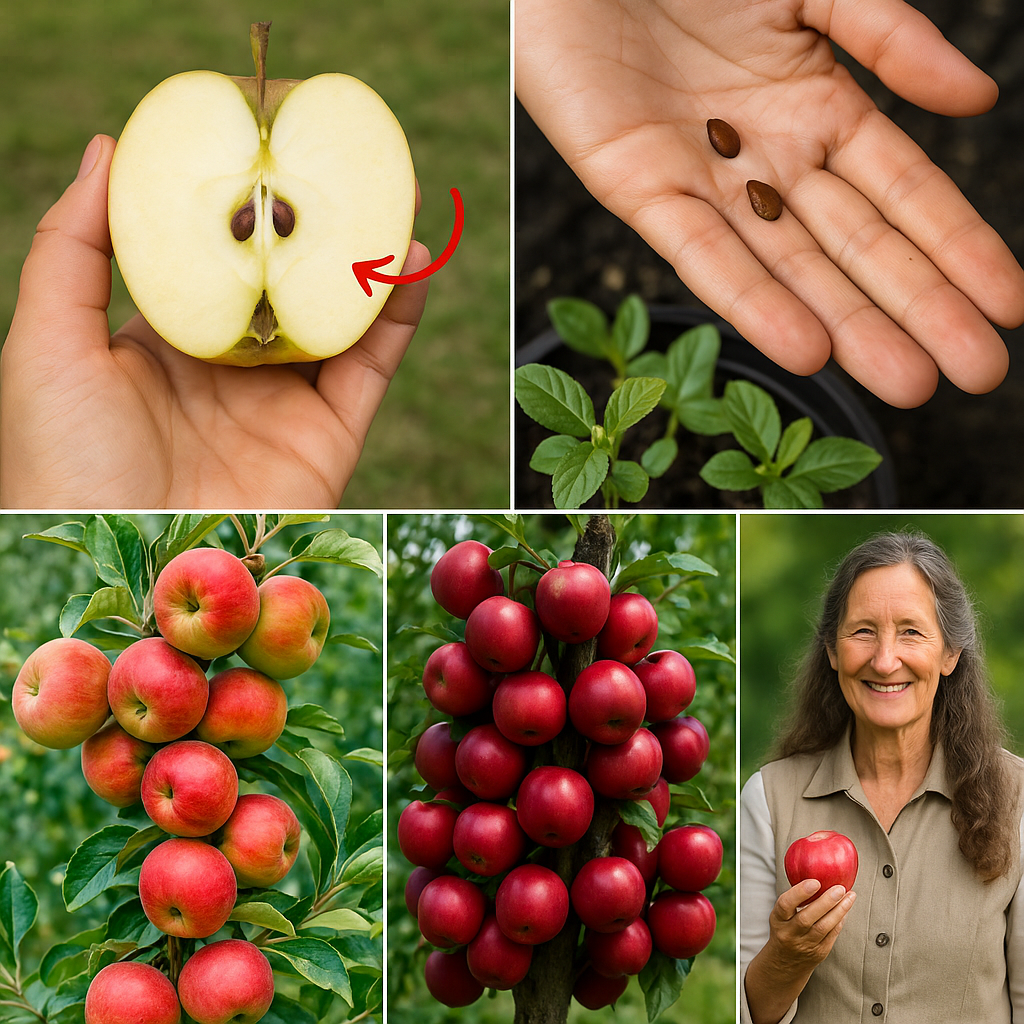
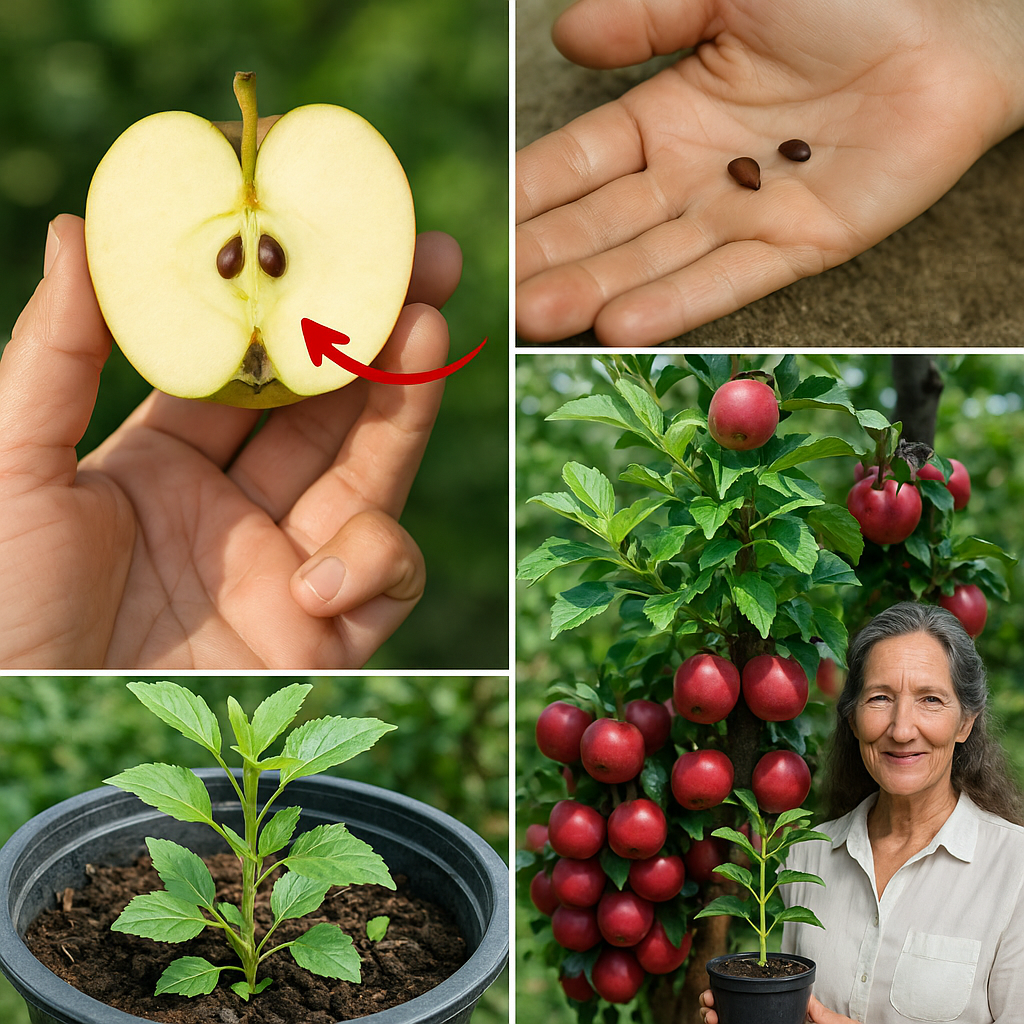
🌰 Step 1: Harvest and Prepare Your Seeds
Start by removing seeds from a ripe, healthy apple. Rinse them gently under cool water to remove any sticky residue.
✨ Important: Apple seeds need cold stratification to germinate successfully.
❄️ Cold Stratification Process:
- Wrap the seeds in a moist paper towel.
- Place them inside a ziplock bag and store them in the refrigerator.
- Keep the seeds cold for 6–8 weeks, checking periodically to ensure the towel stays moist.
This chilling period mimics winter and tells the seeds it’s safe to sprout.
🌿 Step 2: Plant the Germinated Seeds
Once the seeds show small roots (a tiny white sprout will emerge), it’s time to plant them.
- Fill small pots with moist seed-starting soil.
- Plant each seed about ½ inch deep with the root tip facing downward.
- Water gently and cover lightly with soil.
Place the pots in a warm, bright spot but out of direct, intense sunlight initially.
☀️ Step 3: Provide Light and Warmth
Apple seedlings love bright, indirect sunlight. If natural light is limited, use a grow light to ensure they get about 14–16 hours of light per day.
Maintain a consistent room temperature between 65–75°F (18–24°C) for optimal growth.
💧 Step 4: Watering and Early Care
Water lightly when the top inch of soil feels dry. Use a spray bottle to avoid overwatering fragile seedlings.
Keep the soil moist but never soggy — apple seedlings are sensitive to root rot.
When seedlings reach about 6 inches tall and have a few strong leaves, it’s time to think about transplanting.
🪴 Step 5: Transplant to a Larger Container
Choose a large container at least 10–15 gallons in size with plenty of drainage holes.
- Fill it with high-quality potting mix blended with organic compost.
- Carefully transfer the seedling into the container, keeping the root ball intact.
- Water thoroughly after transplanting to help settle the soil.
🌳 Step 6: Train and Shape Your Indoor Tree
Pruning is essential to keep your apple tree compact and encourage fruiting indoors.
✨ Tips:
- Start pruning when your tree is about 1 foot tall.
- Pinch or trim the top to encourage side branching.
- Remove weak or crossing branches to improve air circulation and strength.
A bushier, well-shaped tree produces better flowers and, eventually, more fruit.
🌸 Step 7: Pollination Tricks for Indoor Fruiting
Most apple varieties need cross-pollination. Since you may have only one tree indoors, you will need to hand-pollinate.
✨ How to Pollinate:
- When your tree flowers, use a small paintbrush or cotton swab.
- Gently transfer pollen from one blossom to another.
- Mimic the work of bees by brushing several flowers at a time.
Proper pollination boosts the chances of growing full, juicy apples!
⚡ Step 8: Feeding and Seasonal Care
During the growing season (spring and summer):
- Feed your apple tree every 4–6 weeks with a balanced organic fertilizer.
- Water more frequently as your tree grows and temperatures rise.
In winter, growth slows:
- Reduce watering.
- Move the tree to a slightly cooler area if possible to allow for natural dormancy.
Patience is crucial — fruiting typically begins after 2–5 years depending on the variety and growing conditions.
🍏 Step 9: Harvesting Your Homegrown Apples
When your apples grow full-sized and develop a rich color and fragrance, they are ready for harvest.
✨ Signs of ripeness:
- Apples come off the branch with a gentle twist.
- They have a sweet, crisp aroma.
- Seeds inside are dark brown, not white.
Pick carefully and savor the incredible taste of your homegrown reward!
🌿 Pro Tips for Maximum Success
- Choose dwarf or semi-dwarf apple varieties for easier indoor cultivation.
- Rotate your container every week for even light exposure.
- Support the trunk with a small stake if it becomes top-heavy.
- Keep the tree away from cold drafts and heat sources.
🔥 Common Mistakes to Avoid
- Skipping cold stratification, which leads to poor germination
- Overwatering young seedlings
- Neglecting pruning, resulting in spindly, weak growth
- Forgetting to hand-pollinate during flowering
🌸 Imagine the Possibilities
Picture walking through your living room to check on your apple tree, seeing tiny blossoms open and, eventually, small fruits forming. Each apple a living testament to your patience, care, and connection with nature — right at home.
🌿 Conclusion
Growing an apple tree indoors from seed to fruit is a journey filled with wonder, patience, and deep satisfaction. With a few simple tools and careful nurturing, you can bring the beauty of an orchard into your home — and enjoy the sweet taste of success, one apple at a time.
🌟 Start your apple-growing adventure today — and watch magic grow from a single seed!