✨ Imagine picking fresh, juicy mulberries straight from a tree you nurtured — all from inside your own home. Growing a mulberry tree indoors might sound impossible, but with the right techniques, you can enjoy this delicious superfruit year after year, even without a backyard.
Let’s unlock the step-by-step method to grow your own mulberry tree from tiny seed to fruit-bearing beauty, right in the comfort of your home.
🌱 Why Grow Mulberries Indoors
Mulberries are packed with vitamins, minerals, and antioxidants. Fresh mulberries can be expensive or hard to find, but growing your own ensures you have a steady, organic supply. Plus, a potted mulberry tree adds beauty and life to any living space.
🛒 What You Will Need
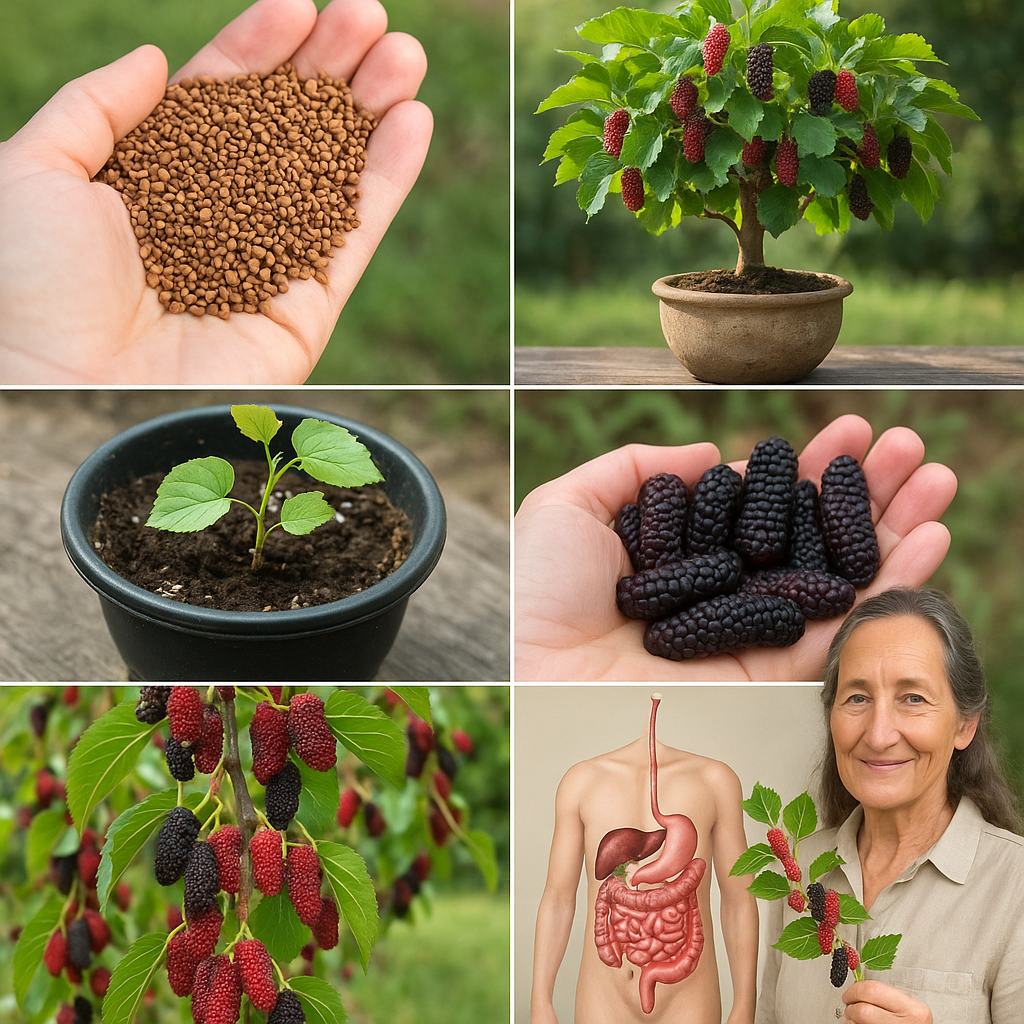
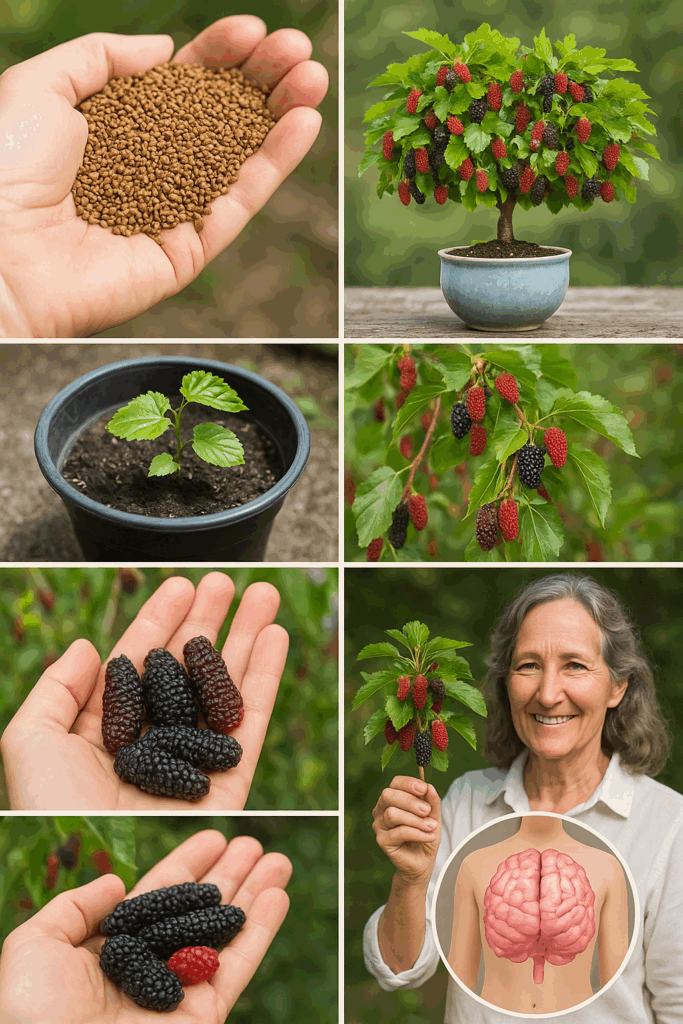
- Fresh mulberry seeds (or fresh berries to extract seeds)
- Seed-starting soil mix
- Small seed trays or pots
- Larger container (15–20 gallons) for transplanting
- Organic compost
- Spray bottle for misting
- Grow lights (optional but helpful)
- Patience and daily care
🌰 Step 1: Prepare and Stratify the Seeds
Fresh seeds need a cold stratification period to break dormancy. Here’s how:
- Clean the seeds thoroughly if starting from fresh berries.
- Place seeds in a damp paper towel inside a sealed plastic bag.
- Refrigerate for 4–6 weeks, checking periodically to ensure the towel remains moist but not soggy.
This mimics winter conditions and preps the seeds for successful germination.
🌿 Step 2: Sow the Seeds Properly
After stratification, plant the seeds about ¼ inch deep in small seed-starting pots filled with moist, well-draining soil.
Place the pots in a warm area (around 70–75°F or 21–24°C). Keep the soil consistently moist using a spray bottle.
Germination can take anywhere from 2 to 8 weeks, so patience is key.
☀️ Step 3: Provide Light and Warmth
Once seedlings emerge, they need plenty of light. Place them near a bright window with lots of indirect sunlight or use a grow light for 12–14 hours a day.
Mulberries love warmth, so maintain a cozy environment and protect the young seedlings from drafts or temperature fluctuations.
🪴 Step 4: Transplant into a Bigger Container
When your seedlings reach 4–6 inches tall and develop strong roots, it’s time to transplant them into a larger pot.
Choose a deep container (at least 15–20 gallons) with excellent drainage. Use a rich potting mix blended with compost for added nutrients.
Plant carefully, keeping the soil level the same as in the small pot.
💧 Step 5: Watering Routine
Mulberries prefer slightly moist but not soggy soil. Water deeply when the top inch of soil feels dry to the touch.
Indoor plants may dry out faster under grow lights, so monitor your watering routine closely. Avoid letting the roots sit in standing water.
🌸 Step 6: Prune for Shape and Strength
Pruning helps keep your mulberry tree compact and manageable indoors.
Once your tree reaches about 2 feet tall, pinch back the growing tips to encourage side branching. Shape the plant so it remains bushy rather than tall and spindly.
Annual pruning also strengthens the trunk and increases fruit production.
⚡ Step 7: Fertilize for Faster Growth
Feed your mulberry tree with a balanced, organic fertilizer every 4–6 weeks during the growing season.
Mulberries are heavy feeders when growing and fruiting, so regular nutrition helps them develop strong branches and bigger harvests.
🌿 Step 8: Pollination Indoors
Mulberries are self-pollinating, meaning one tree can produce fruit without needing a second plant.
To boost pollination indoors:
- Gently shake the branches when flowers appear.
- Use a small paintbrush to transfer pollen between flowers.
These simple tricks mimic natural wind or insect pollination.
🍇 Step 9: Harvesting Your Mulberries
Mulberries usually fruit within 2–3 years if grown from seed under ideal conditions. Some fast-growing dwarf varieties may fruit even earlier.
When ripe, the berries turn deep purple or black and fall easily into your hand with a light touch.
Pick them carefully to avoid bruising and enjoy them fresh, dried, or blended into smoothies and desserts.
🌟 Pro Tips for Indoor Success
- Rotate your container every week to ensure even light exposure.
- Keep the humidity moderate to prevent leaf drop.
- Protect young plants from sudden drafts or AC vents.
- Repot every 2–3 years as the tree outgrows its container.
🔥 Common Mistakes to Avoid
- Overwatering and poor drainage leading to root rot
- Neglecting light needs, causing weak, leggy growth
- Skipping pruning, resulting in oversized, hard-to-manage trees
- Giving up too soon — patience is essential with fruit trees!
🌿 Imagine the Possibilities
Imagine waking up to a lush, thriving tree full of sweet, antioxidant-rich berries — all grown right inside your home. No chemicals, no supermarket runs, no waiting for shipping. Just pure, homegrown goodness that you nurtured from seed to fruit.

🌸 Conclusion
Growing a mulberry tree from seed indoors is a rewarding journey that combines patience, care, and the magic of nature. With the right setup, you can transform a tiny seed into a bountiful source of fresh, juicy berries that enrich your life in more ways than one.
🌿 Start today and bring a little piece of edible paradise into your home — one seed, one branch, and one delicious berry at a time!