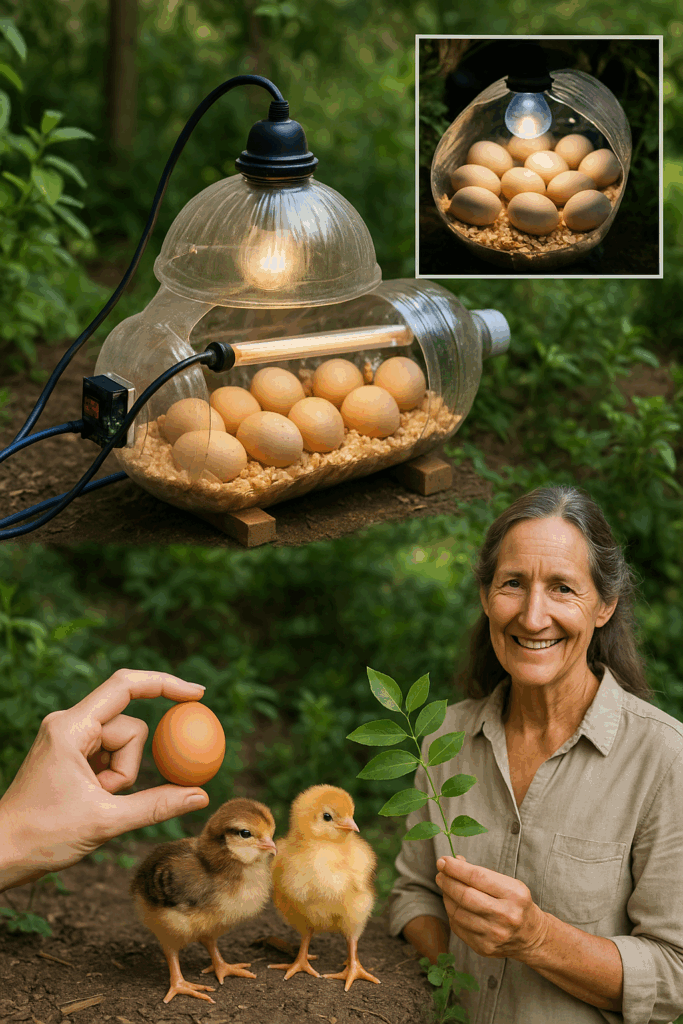
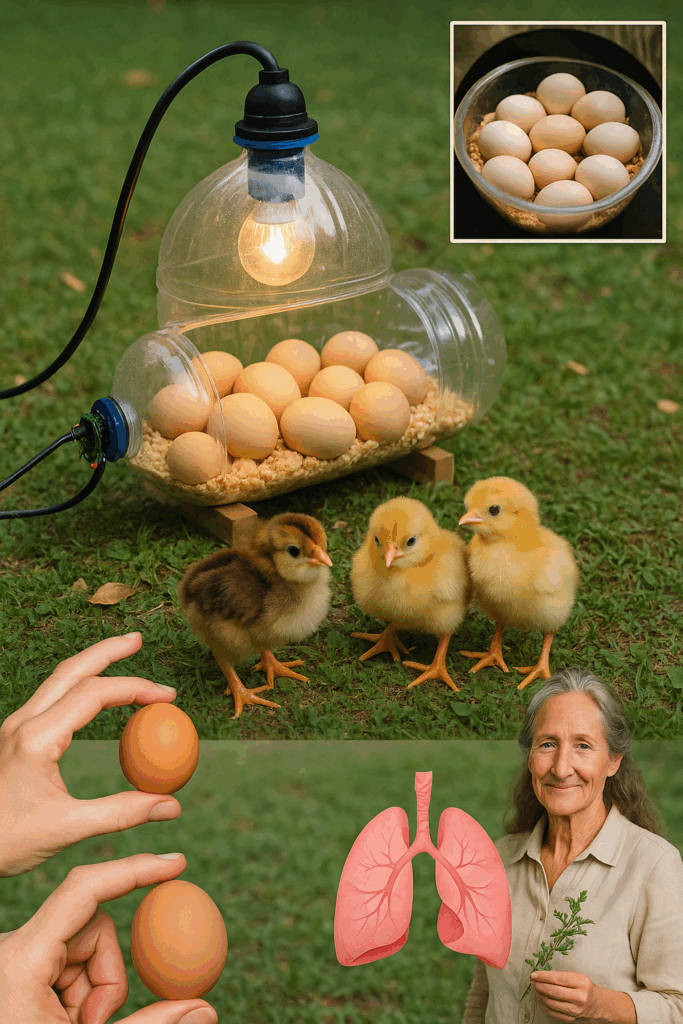
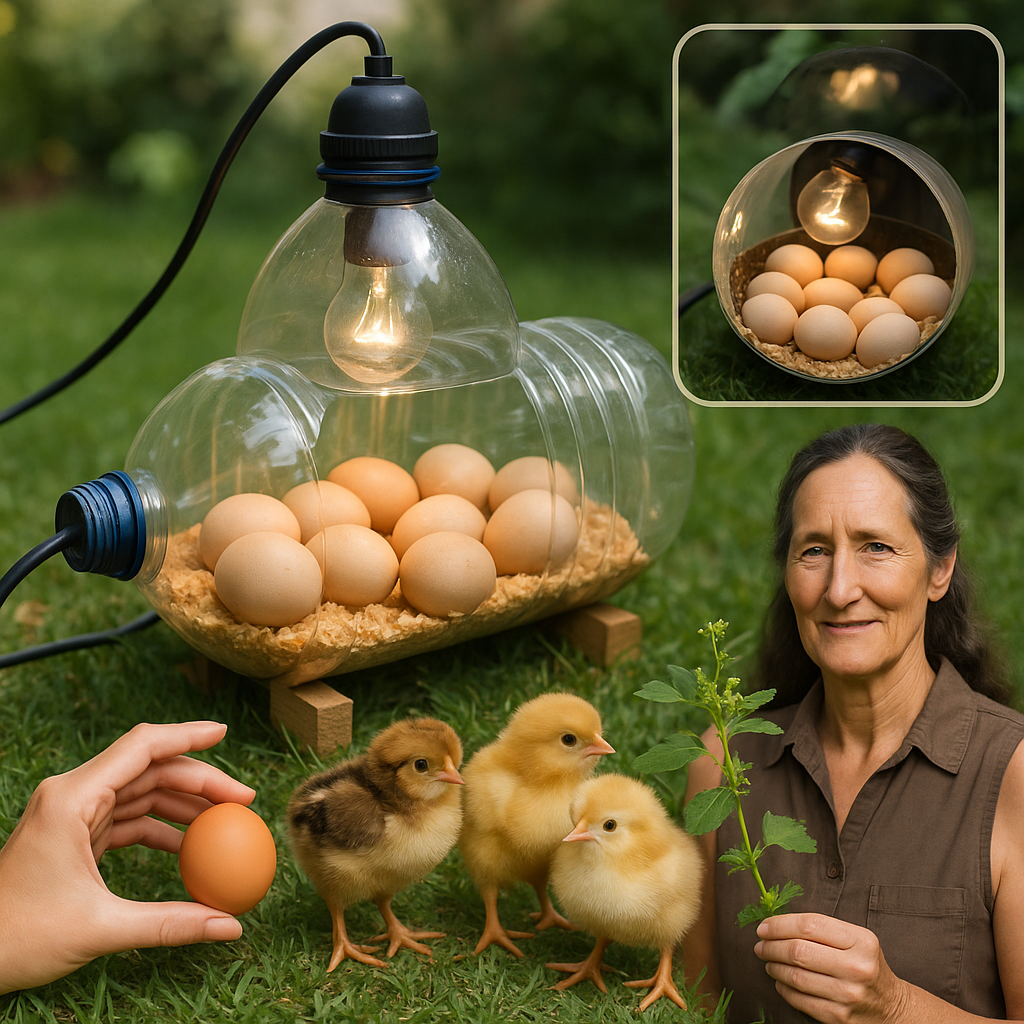
✨ Imagine hatching your own eggs at home without spending a fortune on expensive equipment. It sounds too good to be true, but with a simple plastic bottle and a few household items, you can build an effective homemade incubator — saving money while enjoying the magic of life unfolding right before your eyes.
Here’s exactly how to do it, step by step, even if you have zero prior experience.
🌱 Why Make a DIY Incubator
Building your own incubator is not just about saving money. It allows you to control the environment perfectly for your eggs, understand the hatching process deeply, and feel the satisfaction of crafting something powerful from almost nothing.
Whether you are raising chickens, ducks, or quail, this simple incubator can kickstart your journey into backyard farming or even a small-scale sustainable project.
🛒 What You Will Need
- One large clear plastic bottle (2-liter soda bottle works best)
- Sharp scissors or a utility knife
- Small LED light or a low-wattage bulb (warmth source)
- Tape (electrical or duct tape)
- Thermometer (optional but helpful)
- A few pieces of soft cloth or paper towels
- Water container (small cup or lid)
- Eggs to incubate
🔪 Step 1: Prepare the Plastic Bottle
Carefully cut the plastic bottle horizontally about two-thirds of the way up from the bottom. You should end up with a larger bottom section and a smaller cap section.
Keep the cap screwed on but drill or poke a few small ventilation holes around the top part for airflow.
🌡️ Step 2: Set Up the Warmth Source
Place a small LED light or a low-heat bulb inside the larger bottom section of the bottle. Position it toward one side, not directly under where the eggs will sit.
Make sure the bulb or light generates gentle warmth but not too much direct heat. Overheating can kill developing embryos, so choose your light carefully.
Use tape to secure the light’s position if needed, ensuring it doesn’t move.
💧 Step 3: Create a Humidity Source
Place a small open container of water — like a jar lid or bottle cap — inside the bottle. Humidity is crucial for successful hatching, and the water will evaporate slowly, maintaining moisture in the air.
Top off the water daily to keep the humidity level steady.
🥚 Step 4: Prepare the Egg Bed
Line the bottom of the bottle with a few layers of soft cloth or folded paper towels. This helps cushion the eggs and prevent them from rolling around too much.
Arrange the eggs gently on the soft surface, spaced apart enough for air circulation.
🛠️ Step 5: Assemble the Incubator
Place the top part of the bottle back onto the bottom section like a loose lid. This traps warmth and humidity inside while allowing airflow through the small ventilation holes.
You can tape the sides loosely if you want more stability, but leave it easy to open so you can check on the eggs daily.
📈 Step 6: Monitor Temperature and Humidity
If you have a small thermometer, place it inside the bottle close to the eggs but not touching them.
Ideal temperature for most poultry eggs is around 99–101°F (37.2–38.3°C). Humidity should be moderate during the first stages and increased slightly during the last few days before hatching.
If it gets too hot, simply lift the top slightly to let some heat escape. If it is too cold, consider adding another small light or insulating the bottle lightly with cloth around the outside.
🔄 Step 7: Turn the Eggs Regularly
To mimic natural conditions, turn the eggs gently at least 3–4 times a day. This prevents the embryo from sticking to the shell and encourages healthy development.
Marking one side of the egg with a pencil can help you remember which side was turned last.
⏳ Step 8: Watch for Signs of Life
After about 7–10 days (depending on the type of egg), you can use a small flashlight to candle the eggs — holding the light against the shell in a dark room to look for developing veins or movement inside.
This is an exciting moment that shows your homemade incubator is working!
🎉 Step 9: Hatching Day Preparation
About 2–3 days before the expected hatch date, stop turning the eggs. Increase the humidity slightly by adding a second water container or gently misting the cloth inside the incubator.
This helps soften the shell and supports easier hatching.
Be patient and resist the urge to assist the chicks unless absolutely necessary. Let them emerge naturally at their own pace.
🌟 Success Tips
- Keep the incubator in a stable, draft-free place.
- Monitor temperatures regularly, adjusting as needed.
- Refresh the water daily to maintain consistent humidity.
- Handle the eggs with clean hands and minimal disturbance.
🔥 Common Mistakes to Avoid
- Placing the light source too close to the eggs, causing overheating.
- Neglecting humidity, leading to dry or cracked shells.
- Forgetting to turn the eggs consistently during the first phase.
- Not checking water levels, resulting in low humidity.
💬 Imagine the Joy
Creating a life with just a plastic bottle, a bit of light, and a sprinkle of patience feels almost magical. Watching your chicks peck their way into the world will leave you with an unforgettable sense of accomplishment — and maybe even a brand-new passion for homesteading or self-sufficiency.
🌿 Conclusion
Building a homemade incubator with a plastic bottle shows how little it takes to achieve something extraordinary. With minimal tools and no extra costs, you can experience the wonder of life and nurture future flocks right from the comfort of your home.
🥚 Start today and be amazed by the magic growing quietly inside your simple plastic bottle. Your journey into hatching success is just a few steps away!